
Easy Breezy Tutorial – Raggy Applique
Tutorial Time… What is raggy applique and how do you stitch it?


Using raggy applique designs when you’re merging a new project is one way to get a quicker stitch time without giving up a large design area. Raggy appliques vary in their outline styles but they all skip the thicker satin stitching you find on standard embroidery designs. Instead, they can vary between styles like a sketch stitch, loose scribbled rows of single stitch, or the bean stitch shown in our Leaping Ballerina.
This raggy style works really well with one or two layers of cotton blend fabrics. Personally, I prep as much of my applique fabric as I can with Heat N Bond Lite (HNBL) to give a crisp look and prevent fraying… even on raggy applique. If I’m using two layers of fabric, then I just prep the top layer with HNBL and let the regular back layer get a more ragged look. Just remember to use the tip of your iron when pressing the main fabric areas and avoid the raggy edges.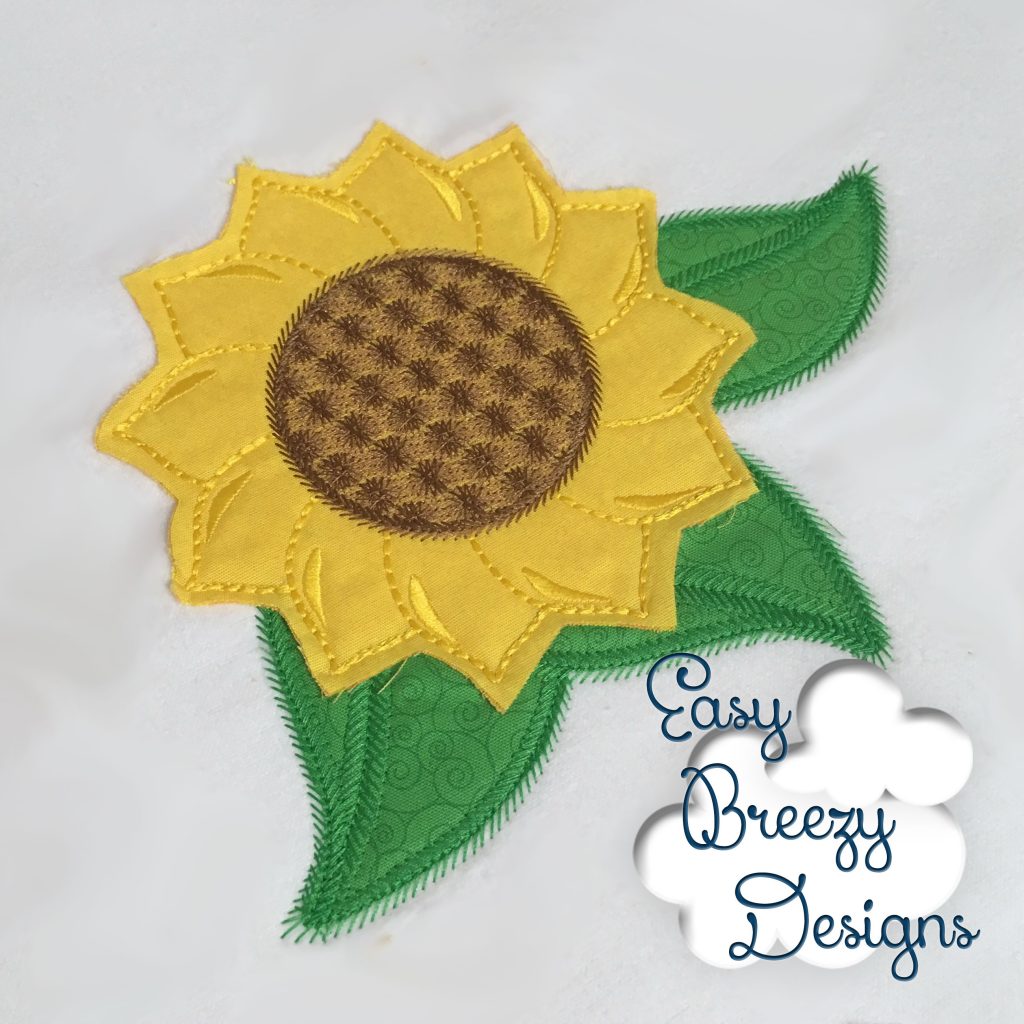
Stitching raggy appliques is really simple. The design files can vary by digitizer but I try to be consistent on ours.
Step 1 of the raggy part of your applique is your fabric outline.
Place a Pause/Reserve Stop to place the fabric in appropriate area.
Step 2 is the fabric tack down to stitch your fabric in place.
Place a Pause/Reserve Stop to trim your fabrics – Do not trim as close as you do on standard applique. Leave at least an 1/8 inch of fabric around your design.
Step 3 is the final detail stitch followed by any other design detail stitching.
Repeat as needed for additional fabric placements.
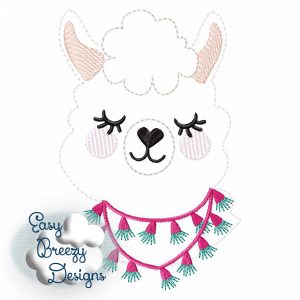 I group as many fabric placement steps together as possible but sometimes we do separate them to give a specific layered look. Check out our Lovely Llama design for a layered example. Her body and ear detail are stitched first, then her hair patch and her nose area are outlined and fabrics are placed before finishing out the rest of the detail stitching.
You’ll notice in the steps above that your fabric needs at least an 1/8″ edge when trimming. It’s all about preference and the look you want. Some people trim their pieces to about an 1/8″ out for a close cut look, and others will leave about 1/4″. It just depends on how much you want to rag it out. 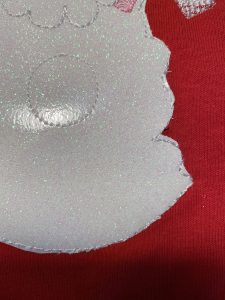
If you’re just starting with raggy applique, err on the side of caution. Leave 1/4″ or even 1/2″ edge and trim back a little at a time to figure out the look you like without losing a garment to the learning process. I’m all for creativity and you can play with non-woven fabrics but watch out for your edges… Check out this photo to see how trimming too closely on the tack down step will not be covered up in your detail stitching.
Once you’ve finished stitching and trimming you can rag the edges or let them rag on their own as they age. Ragging can be done by rubbing your thumb nail or an eraser (a clean one) across the edges to fray out a bit of the threads. Again, it’s all about preference and what works for you.
I hope this helps you understand the style. If you have questions or need any help, please feel free to reach out.
~Cheryl
